Following on from Checklist for onsite supervision for screeding Tips 1 – 3 we present tips 4 -6.
4. Screed Mix
 Check that the raw materials and the mixing of screed are correct. The ideal mix proportion for normal cement/sand screeds is – 1:3 to 1:5 – that is 1 part Portland Cement ( which complies to BS12) mixed with 3 to 5 parts of sand which complies to grading limit C or M of BS882 (where not more than 10% should pass through 150mm sieve), and should be mixed with water of potable quality. Make sure the screed mix proportions are checked against the data sheet for specialist proprietary screeds.
5. Batching and Mixing
- Where screed pumps are used, check the suitability of screed mix for pumping. Cement content, water content and aggregate grading can affect the pumpability of screeds.
- When using ready mix screeds, check the screed supplied is in accordance with BS4721: 1981. Batching should ideally be done in compliance with BS EN 13139. This is a new standard applying solely to pre manufactured ready mixed screeds delivered to site. For more information on the topic please visit the University of Stuttgart website.
- Check the workability of the screed using the ‘snowball test’ by squeezing a handful of screed mix with a gloved hand. The right workability is when the screed forms a moist ball on releasing the hold, and does not crumble (too dry) or drip water (too wet).

6. Laying and Compacting
- If using a bonding slurry grout, ensure that the screed mix is laid on the base while the grout is still wet, and see to it that the screed mix is consolidated thoroughly to achieve the expected level and maximum compaction.
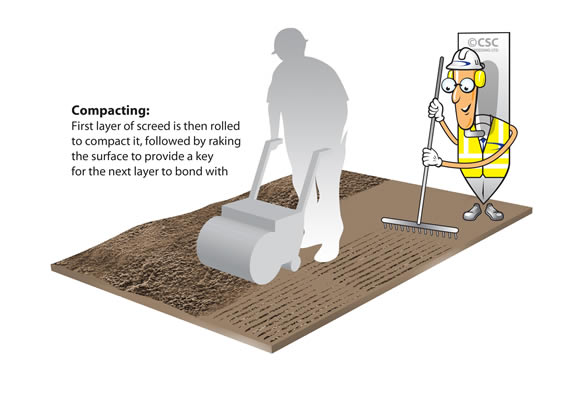
- Pay special attention to bay edges and corners. Ensure that thicknesses of over 50-60 mm are compacted in two separate layers, with minimal time delay between laying of the layers. For thickness greater than 75mm make sure layers of 50mm are rolled and raked, applying fresh on fresh screed to achieve thorough compaction throughout the full depth.
- If using reinforcement, check that it is laid at approximately mid-depth of the screed.

Come back soon for tips 7 – 10


