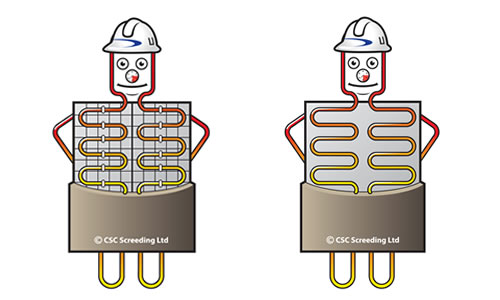
From the heating chambers of The UFH Man
Hello folks! I’m your friendly neighbourhood UFH specialist, here to share my knowledge about the fascinating world of underfloor heating and screeds. After years of working with pipes, pumps, and thermal dynamics, I’ve learned that successful UFH screeding is all about understanding the dance between heat and concrete.
Whether you’re dealing with water-based systems or electric cables, the principles remain the same: respect the thermal movement, maintain proper coverage, and never forget that heat travels in mysterious ways! Let me guide you through the technical intricacies and practical solutions that make UFH screeding successful.
Underfloor heating (UFH) screeds require special consideration due to the thermal stresses imposed by heating and cooling cycles. The screed must efficiently transfer heat while accommodating thermal movement.
Water-based systems: Use plastic pipes carrying heated water, typically requiring 65-75mm screed thickness.
Electric systems: Use heating cables or mats, typically requiring 50-65mm screed thickness.
UFH systems cause cyclic expansion and contraction
Rapid heating during early cure or inadequate joint provision
Controlled commissioning and proper joint design
Uneven screed thickness or air voids around pipes
Careful leveling and proper compaction techniques
Excessive screed thickness or poor thermal conductivity
Optimize thickness and use thermal additives
Rapid moisture loss during curing period
Proper curing procedures and environmental control
Critical design factors for screed over underfloor heating systems including thickness, thermal performance and movement management.
Construction Method
UFH screeds use floating construction with DPM and tacker insulation panels laid over concrete substrate. Heating elements are fastened to tacker boards and screed is laid to encase them. Thermal insulation separating layer is essential to prevent heat loss through the base.
Minimum Thickness Requirements
Minimum Thickness Requirements
• D49 or D98 mesh per BS 4483
• Polypropylene fibres with steel reinforcement
• Follow DIN 18560 Part2 for stress relief measures
• Position mesh mid-depth for optimal performance
Pressure Testing Protocol
• Screed with UFH pipes under pressure
• Use water with antifreeze, never air
• Water prevents undetected pipe damage
• Maintain test pressure throughout installation
Temperature Control
• Minimum air temperature: 3°C and rising
• Maintain temperature for 5 days minimum for strength gain
• Never expedite drying by turning on heating system
• After 4 weeks: Turn on heating at low level, increase gradually
Winter Installation Guidelines
Don’t let screed freeze – water expands 9% when freezing. Frozen screed becomes friable (dusty and breaks up). Store sand materials in warm conditions and avoid temperature extremes across job sections.
Commissioning
Professional commissioning is essential. Gradual temperature increase prevents thermal shock and ensures optimal performance. Follow manufacturer specifications for heat-up procedures.
Common Issues with Cementitious Screeds
Major issue with cementitious screeds around heating pipes resulting in inadequate screed soundness beneath hot water pipes. High shrinkage potential + temperature variation = cracking and curling.
Movement Management Strategy
• UFH screeds experience constant expansion/contraction throughout floor life
• Floating construction allows full movement potential
• Design must accommodate movements to prevent flooring disruption
• Install crack inducement joints strategically
Crack Prevention Methods
1. Choose appropriate screed type for UFH applications
2. Install proper reinforcement (mesh or fibres)
3. Design adequate stress relief measures
4. Follow manufacturer drying guidelines
5. Never tile directly over cracked screed
Stress Points Management
Critical areas include doorways, corners, and temperature transition zones. Use strategic placement of movement joints and consider fast-drying screeds like FlexiDry for controlled drying and reduced crack risk.
Comprehensive guide to drying times, moisture testing and fast-track solutions for time-sensitive projects.
Traditional Screed Drying Times
• Mix ratio: 1:4-5 (cement:sand)
• Drying time: Up to 121 days at 20°C
• Drying rate: 1mm/day first 40mm, then 0.5mm/day
• Light traffic: After 48 hours (protected surface)
Fast-Track Solutions
• Drying time: Just 3 days complete vs 110 days traditional
• Light traffic: From 12 hours after installation
• No 7-day curing required
• Modified chemistry for rapid moisture loss
Moisture Testing Requirements
• Visual inspection insufficient – surface may appear dry while harboring moisture below
• Calcium Carbide Test recommended at end of drying period
• 75mm traditional screed: 110 days at 20°C/50%RH
• Modified screeds: Shorter times due to water-reducing additives
Crack Prevention Methods
1. Choose appropriate screed type for UFH applications
2. Install proper reinforcement (mesh or fibres)
3. Design adequate stress relief measures
4. Follow manufacturer drying guidelines
5. Never tile directly over cracked screed
Professional Guidance
Manufacturers focus on mechanical installation only. Seek specialist advice for UFH system design considering all factors: structural, thermal, and moisture management. Follow British/European standards for best results.

Remember folks, UFH screeding isn't just about laying concrete over pipes - it's about creating a thermal partnership that will keep homes warm for decades. Take your time with the design phase, respect the thermal physics, and never rush the drying process. The extra care you take today will pay dividends in comfort and efficiency tomorrow.
Stay warm, stay smart, and keep those heat pumps happy!
Yours sincerely,
The UFH Man
Your authoritative resource for floor screeding knowledge, expert guides, and professional insights.
© 2025 CSC Screeding Ltd. All rights reserved.